How to Set Up Premiere Pro to Edit FASTER
Introduction
Hello there! Welcome back to my ongoing series where I'm gonna show you how to edit faster in Premiere Pro. Today I'm gonna be showing you how to set up your workspaces in Premiere Pro. This will include how to utilize your workspaces, how to how to organize panels, and also how I organize bins so I always know where all my assets are. So without further ado, let's just dive right in.
Workspaces
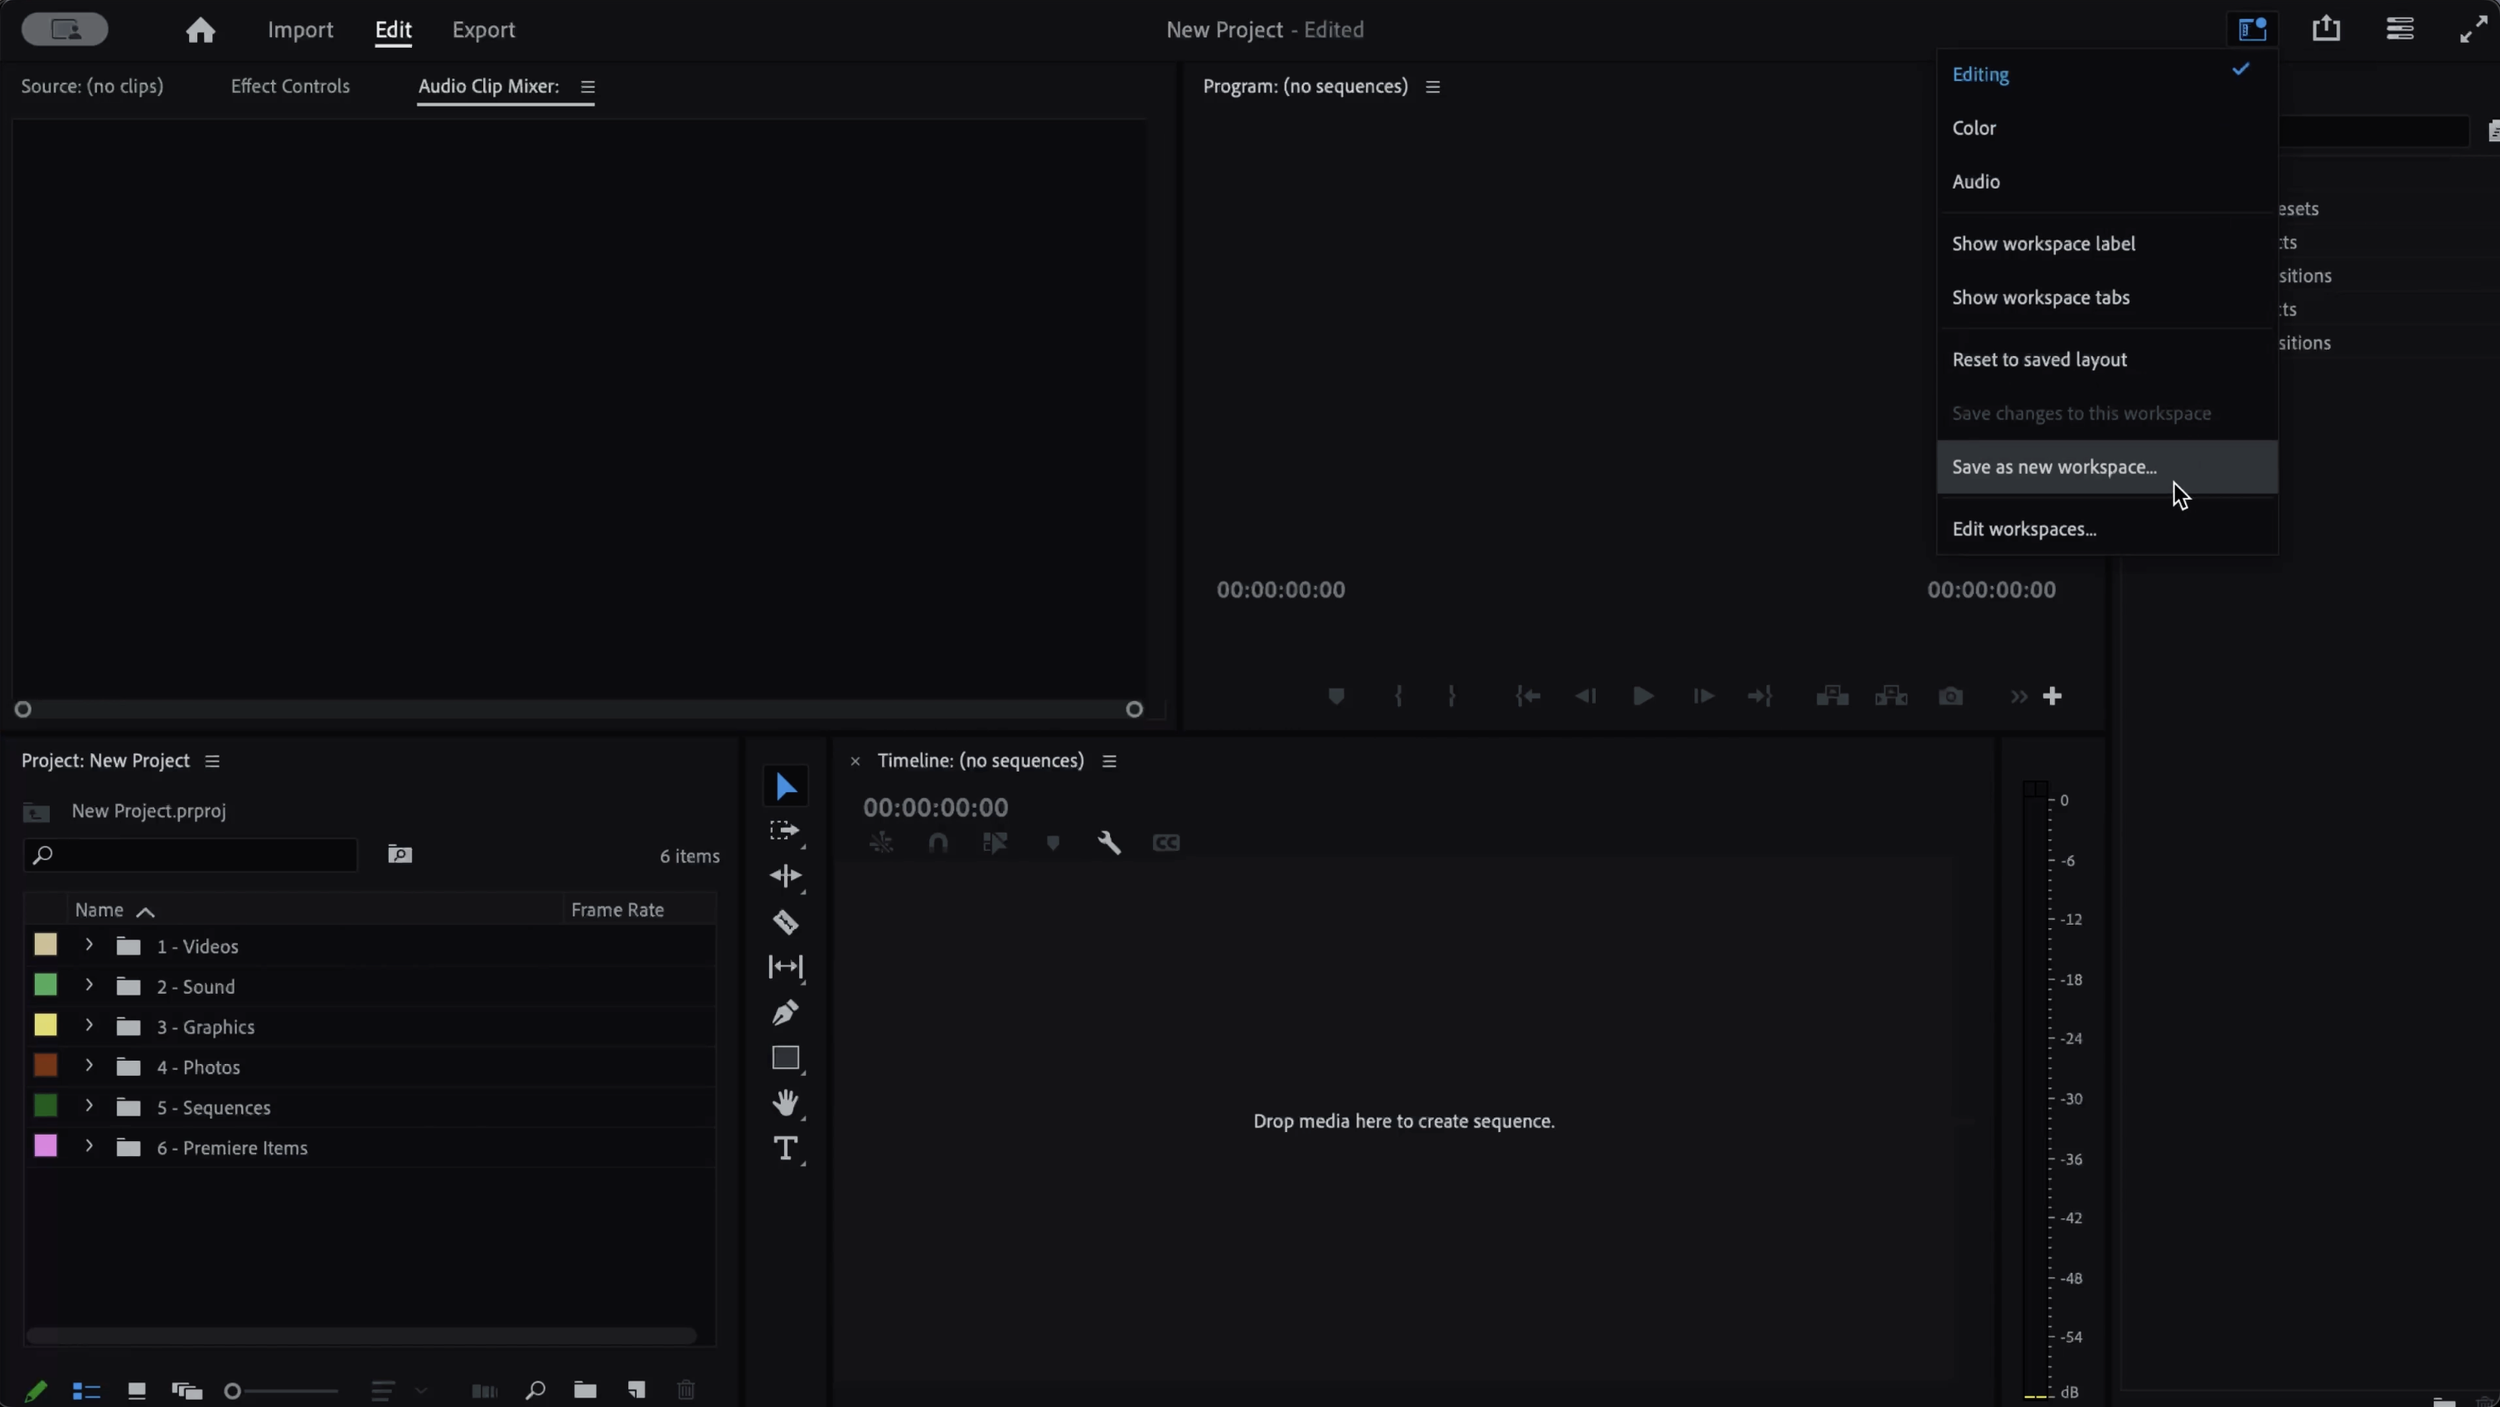
So the first thing we want to do when we go into our new project is organize our workspaces. If you go into our top right corner where it says workspaces, you can see that we have all these different options:
However, I only need 3 of them: Editing, Color, and Audio. This is just my preference. And to do that, we are going to need to get rid of any workspaces that we do not use. This is how.
Go up to the workspaces tab and click “edit workspaces”:
Then go ahed and drag every workspace that is now editing, color, or audio into do not show.
Click OK when done
And now we are left with the 3 workspaces:
Go back to the workspaces tab and click Save as new workspace… and rename it to Main. Drag the editing tab to do not show and now you are left with the 3 spaces we want.
Panels
So now that we filtered out all the different workspaces that we want, it's time to organize our panels.
To keep it simple go through all the panels in the main workspace and only keep:
Source
Effect Controls
Audio Track Mixer
Bins
Timeline
Program
Effects
Audio level thing
Delete the unwanted panels by hitting CTRL or CMD + W.
The only thing I change is dragging the effects panel to the very right like this:
Then I resize everything and by the end, your workspace should look like this:
Bins
So now that we have our panels, all organized, it's time to look at our project bits. So as you can see here, we have our project bins here we have video sound graphics, photos, sequences, and Premiere items.
So as you can see, our first four folders correspond with our first four folders in our assets folder.
We then move on to 5 - Sequences. This is where I create different timelines that correspond to the different platforms out there. So as you can see, there is 1080 and 4K 24. This is going to be for YouTube, and movies, whatnot. And then there’s Instagram 30 FPS and some anamorphic options. So depending on the film you want to make, just double click on the corresponding sequence to open the timeline.
Now onto the final bin: 6 - Premiere Items. This is just where I store different adjustment layers that corresponds to the sequences in 5 - Sequences:
And I do this so I don't have to go to the “New item” -> adjustment later -> click OK. All I got to do is just drag the corresponding adjustment layer onto the timeline when I start editing.
Conclusion
And that is pretty much it to my workspaces. And as a bonus tip, after you change your preferences instead of changing every time to create a new project, all you can do is just save this blank project file onto your desktop or computer somewhere. And then when you want to start a new project, all you got to do is right click, click duplicate, and then drag it into your corresponding project folder. Open it and all of your settings will be saved in that new project. Then just drag and drop your assets into the right bin.
And because I'm nice, you can download this project file and my entire file management folder completely free! Just click the link right here:
So hopefully you learned something new about how to organize your projects in Premiere Pro. If you have any questions, please let me know. And I'll see you in the next one.


